Badges
Instant identity and access at scale. Dynamic fields reflect live guest data, and batch print/export keeps check-in fast�—with layouts tuned for scan reliability.
Overview
Design and generate printable or scannable badges for event attendees. Badges can reflect dynamic guest data, tags, seating, access zones, and QR / barcode identifiers.
User Story & Walkthrough Video
End-to-end badge lifecycle: template creation, dynamic fields, preview, batch generation, and export.
Download / Open Directly: Download the MP4
Primary User Story:
“As event operations staff, I need to quickly design and mass-produce branded, scannable badges so on-site check-in is smooth and professional.”
Update & Print Badge Video
Editing an existing badge template and reprinting an updated single badge on-site.
Download / Open Directly: Download the MP4
Secondary User Story:
“As a check-in desk lead, I need to edit an existing badge template and quickly reprint an individual attendee’s badge so corrections are reflected immediately.”
Key Capabilities
- Badge template creation (layout + placeholders)
- Dynamic fields: name, company, role, tag, QR code
- Style controls: fonts, colors, logo placement
- Batch generation & export (PDF)
- Integration with check-in / scanning
Workflow
1. Access Badges
Navigation > Badges
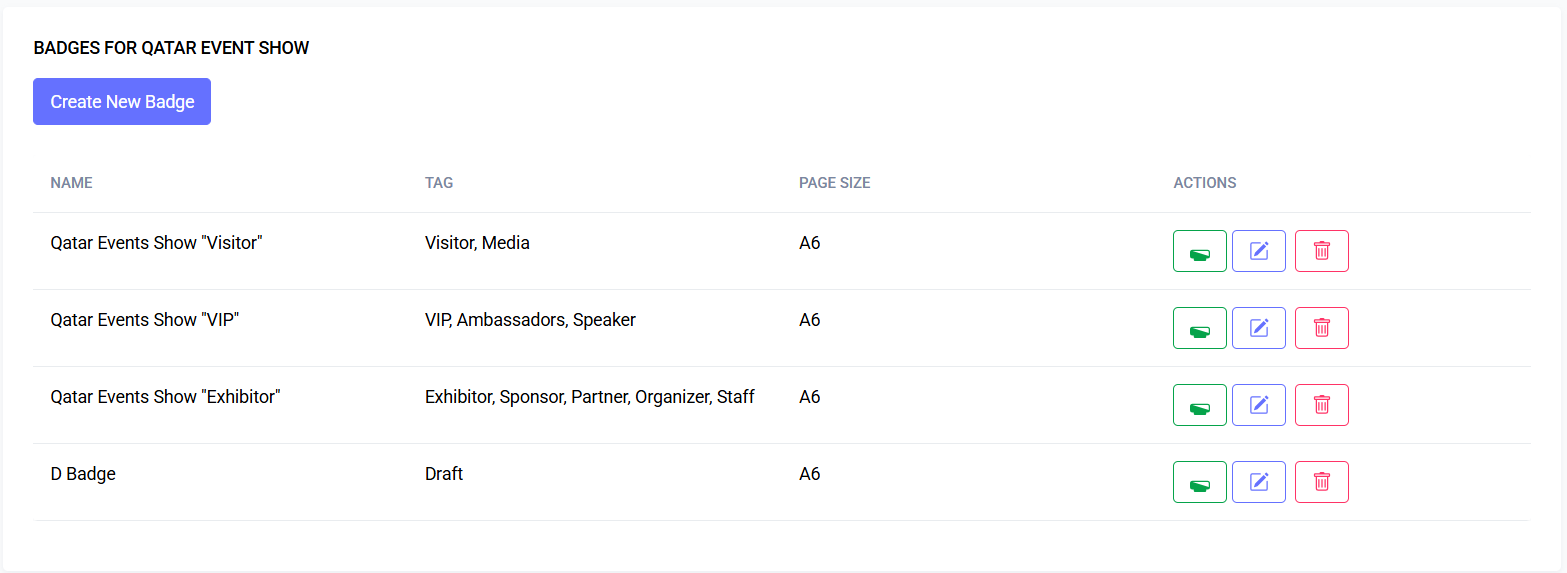 Screenshot: Badge Template List
2. Create a Badge Template
- Click "Create Template"
- Choose size (A6, 4x6, Custom)
- Define orientation (Portrait / Landscape)
- Save
![]() Screenshot: Badge Editor Blank
Screenshot: Badge Editor Blank
3. Add Elements
- Drag or add: Text, Image, QR/Barcode, Tag Block
- Use merge variables like:
{{ first_name }},{{ last_name }},{{ tag }},{{ company }}
4. Configure QR / Barcode
- Select data source: guest UUID, ticket code, custom pattern
- Choose symbology: QR, Code128
5. Preview
- Pick sample guest to render live preview
6. Batch Generate
- Open "Generate"
- Filter guests (by tag, status, ticket)
- Generate PDF / ZIP of images
7. Print / Distribute
- Use high-resolution PDF export for print vendor
Permissions
| Action | Permission |
|---|---|
| View Templates | badge.view |
| Create Template | badge.create |
| Edit Template | badge.edit |
| Generate Badges | badge.generate |
Merge Variables (Examples)
| Variable | Description |
|---|---|
{{ first_name }} | Guest first name |
{{ last_name }} | Guest last name |
{{ full_name }} | Combined name |
{{ tag }} | Primary tag name |
{{ ticket_type }} | Ticket label |
{{ qr }} | QR payload (auto) |
Best Practices
- Keep font sizes legible (>11pt)
- Reserve space for long names
- Test printer margin bleed settings
Troubleshooting
| Issue | Fix |
|---|---|
| QR not scanning | Ensure high contrast & quiet zone |
| Variable blank | Guest field missing or not mapped |
| PDF misaligned | Adjust template padding / DPI |
Who This Guide Is For
- Event managers: set standards, approve templates.
- Designers: create branded layouts and styles.
- Check-in staff: reprint, single-badge fixes, emergency edits.
- Vendors/printers: use supplied PDFs and specs.
Quick Start (5 steps)
- Create a template (size + orientation).
- Add logo, attendee name, company, and a QR element.
- Map merge variables to your guest fields.
- Preview with a few attendees and fix overflow.
- Generate a print-ready PDF for all confirmed guests.
Design Essentials
- Canvas & safe area: keep critical text 3–5 mm inside edges.
- Grid & alignment: align elements; avoid "almost" alignment.
- Contrast: black text on light backgrounds scans best.
- Logos: use SVG/PNG at 300 DPI; avoid tiny thin strokes.
- Names: prefer Full Name in one line; wrap to two lines max.
- Secondary text: make company/role smaller and lighter weight.
Data Mapping
- Sources: attendee profile fields, ticket fields, tags.
- Mapping rules:
- If a variable is empty, set a fallback (e.g., "Guest").
- Trim whitespace and collapse double spaces.
- Limit characters for single-line text where needed.
- Common variables:
{{ full_name }}→ e.g., "Aisha Al-Khalifa"{{ company }}→ e.g., "Systema Group"{{ role }}→ e.g., "Speaker"{{ tag }}→ e.g., "VIP"
- Tips:
- Test with longest names and multi-word companies.
- Use conditional styling if supported (e.g., VIP = gold bar).
QR and Barcodes
- Recommended: QR Code, error correction level M or Q.
- Minimum printed size: 25 mm (1 in) with 3-4 mm quiet zone.
- Payloads:
- Guest ID: uuid:123e4567-e89b-12d3-a456-426614174000
- Ticket code: t:ABCD-1234
- URL: https://event.example.com/c/ABC123
- Scanning reliability:
- High contrast (dark code on light background).
- Don’t place over photos or gradients without a solid pad.
- Avoid glossy laminates directly over QR; use matte if possible.
- Code128 barcodes:
- Use for numeric/alphanumeric short codes.
- Keep height ≥ 15 mm and verify with a handheld scanner.
Printing Guide
- Export
- Use batch PDF export for commercial printers.
- Use single badge export for on-site fixes.
- DPI & size
- Export at 300 DPI. Typical sizes: 4×6 in, A6, custom.
- Include crop/bleed if your vendor requests it (1.5–3 mm).
- Materials
- Paper: 200–300 gsm or PVC card stock.
- Laminates: choose matte to improve scanning.
- Label printers (Zebra/Dymo)
- Match template size to the exact label size.
- Disable printer scaling; set 203 or 300 DPI correctly.
- Print a test sheet and validate QR readability.
Common Recipes
- VIP Highlight
- Add a top band with
{{ tag }}; style VIP in gold/red.
- Add a top band with
- Zone Access Icons
- Add small icons for A/B/C zones; map to attendee tags.
- Double-Sided Badges
- Front: name + company + QR. Back: schedule or Wi‑Fi info.
- Team vs. Guest
- Duplicate template, switch accent color, and lock staff roles.
Expanded Troubleshooting
- Text truncation
- Increase box width/height or enable wrapping; reduce font size.
- Garbled Arabic or RTL text
- Use a font with full RTL support; enable RTL if available.
- Faint prints / washed blacks
- Set printer to high-quality; export pure black (#000) text.
- Misaligned after print
- Turn off "Fit to page"; print at 100% scale.
- Scanner can’t read some codes
- Increase QR size; raise error correction; ensure flat badges.
FAQ
- Can I re-use a template across events?
- Yes. Duplicate the template and remap event-specific fields.
- How do I reprint a single badge?
- Open the attendee, choose "Reprint Badge" from actions.
- How can I include a sponsor logo?
- Add an image element and upload per template or per tier.
- Do you support CSV imports for batch badges?
- Yes. Import guests first, then generate badges from filters.
Last updated: 2025-10-09