Events
Overview
Events are where you set up and manage everything for a specific conference, workshop, or meetup. Each event contains its own guests, registration form, tickets, badges, emails, and statistics.
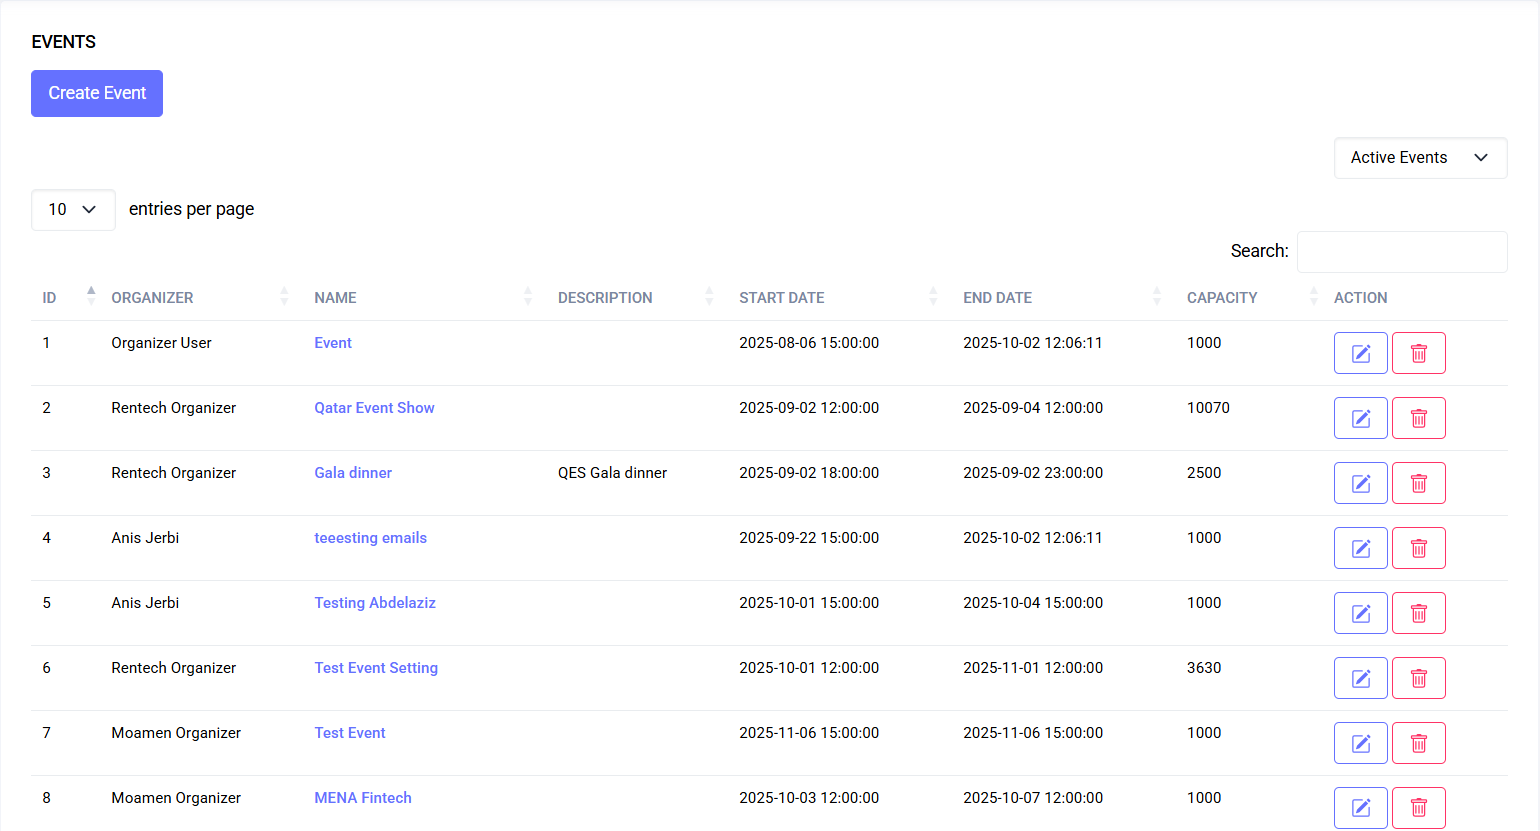
The Events Page (List)
- Button: Create Event (top of the page, if you have access)
- Toggle: List View or Calendar View
- Filter: Active Events, Deleted Events, or All Events (applies to both views)
- Columns: ID, Organizer (admins only), Name, Description, Start Date, End Date, Capacity, Action
- Click an event name to select it and continue managing guests, tickets, emails, badges, and statistics for that event
 Events list (placeholder)
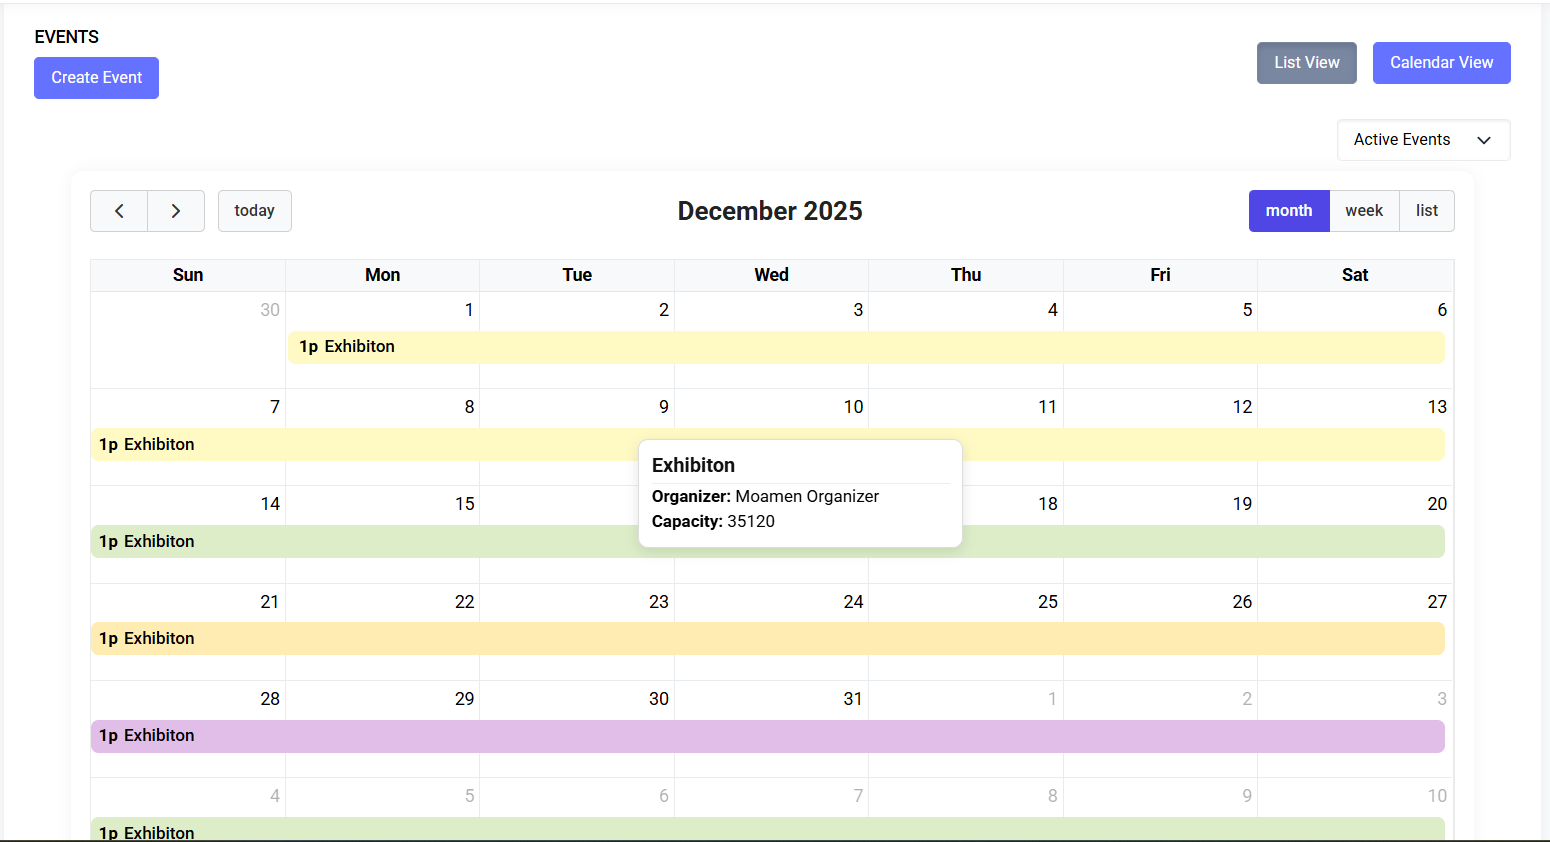
Calendar View
Quickly see events laid out over time. Use this when you want a high‑level schedule view.
- Switch to it with the “Calendar View” button at the top-right
- The same trash filter (Active / Deleted / All) applies to the calendar
- Timezone: event times are shown in your profile’s preferred timezone
- Colors adapt to light/dark theme; colors are informational only
- Hover an event to see details:
- Title
- Capacity
- Organizer (admins only)
- Click an event to select it and jump to managing that event
 Calendar view (placeholder)
Create an Event
Navigation → Events → Create Event
Download / Open Directly: Download the MP4
Event lifecycle: create, configure registration & tickets, monitor stats, clone and archive.
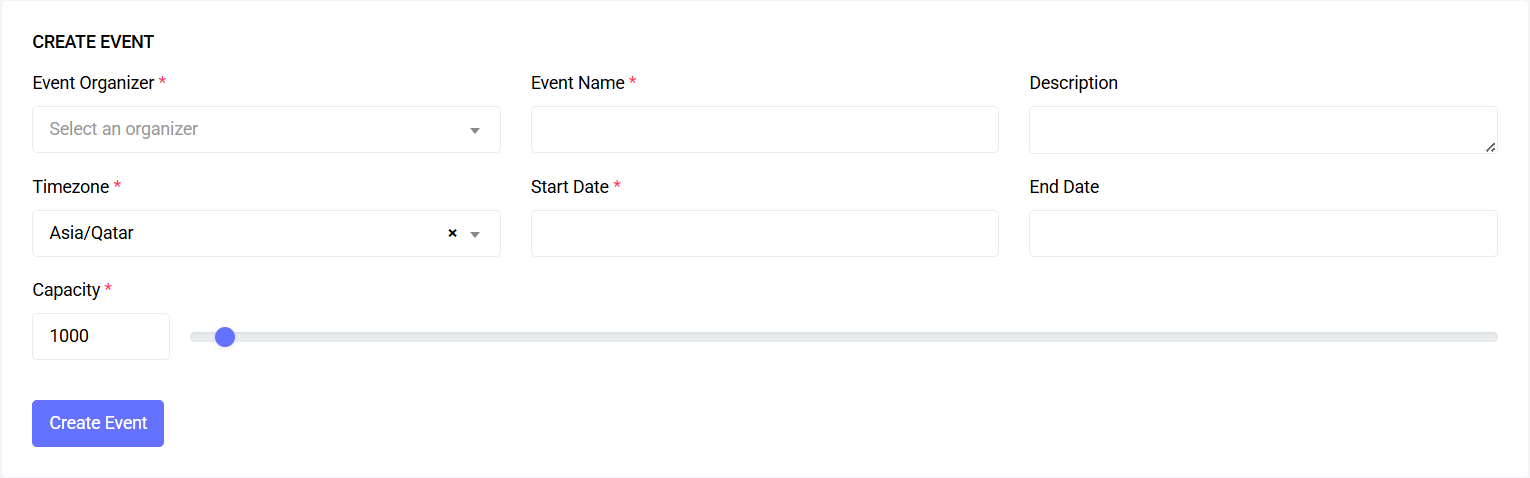
Fill out the form:
- Event Name (required)
- Description (optional)
- Timezone (required)
- Start Date (required) – date and time
- End Date (optional) – can be the same day or later
- Capacity (required) – choose with the number box or the slider (10 to 50,000)
- Send confirmation emails (toggle) – when on, guests automatically receive confirmations
- Organizer (admins only) – choose which organizer owns the event
 Create event form (placeholder)
Tips:
- Pick the correct timezone before you add tickets, workshops, or email schedules
- Capacity can be increased later; decreasing below current registrations isn’t allowed
Edit an Event
From Events → find your event → pencil icon (Edit)
- You can update name, description, timezone, dates, capacity, and the confirmation email toggle
- Save to apply changes
Event Actions
You’ll see action buttons in the table for each event (depending on your access):
- Edit – update event details
- Delete – move to Deleted Events (can be restored later)
- Restore – bring back a deleted event
- Permanently Delete – remove forever (cannot be undone)
Selecting an Event (What happens next?)
Click an event (in Calendar View) or an event name (in List View) to work inside it. You’ll be taken to the most relevant section for your role:
- Organizers → Statistics first (if allowed)
- Scanner role → Scanner page
- Printer role → Badges page
- Others → Guests list
Registration, Tickets, Emails, Badges, and Stats (Where to find them)
After selecting an event, use the left navigation to open:
- Guests – see registrations and manage attendees
- Tickets – create ticket types, prices, and sale windows
- Emails – set up automated confirmations and reminders
- Badges – design and print attendee badges
- Statistics – track registrations, attendance, and more
Best Practices
- Set timezone and capacity at creation time
- Enable confirmation emails if you want automatic attendee messages
- Use Deleted Events instead of permanent deletion when you might need the record later
- Select the event by clicking it (Calendar) or its name (List) before configuring guests, tickets, emails, or badges
Last updated: 2025-11-12